
Friday, December 11, 2009
This logo was designed to represent "Electronics." Sinohui is my last name and so I decided to name it "Sinohui Electronics." It took me quite a while to get all the tools controlled and to learn what most of the tools did. Once I learned most of the Photoshop tools, I used them and realized that it wasn't quite that hard to blend and use all of those tools on my logo. I followed another workflow Online, and my logo kind of came out like it, but I think I could have done better, because then I didn't really know what all of those tools he used were located at, and so I tried my best to do what he did. At the end of the logo project I started to find those tools that I couldn't find at the beginning of the project, I couldnt't edit the logo anymore because it was due already, but I know now that if I did it over, it would come out even better.

Wednesday, December 2, 2009
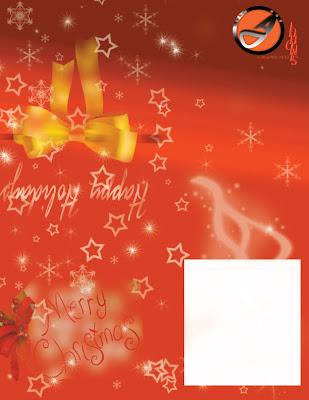 Work-flow for Christmas Card. By: Jorge Sinohui, Period 1, Computer Art
Open Adobe Photo-shop 7.0, and go to File and click on New and name it Christmas Card.
Make sure it is a CMYK type, and it has to be 8.5 inches by 11 inches.
Then click OK, and then put a color red on the background of the layer.
Create a new layer and download new brushes off the Internet, and they are stars and snow flakes.
To download these brushes you have to save them to your documents and open them in photo-shop.
Go to the brush tool, and go to load brushes and then open the brush there and you will have the stars and snowflakes brushes to use.
After you have the new brushes, go to Brushes which is at the right corner next to File Browser, and make the spacing 300% and then click out of that option and then start stamping the stars or snowflakes onto the layer.
After make a straight line using the Pen Tool, and then put a layer mask and lightly reveal it with the brush tool.
Then put a gold ribbon on top of that line and like the line, add a layer mask on the ribbon, and also lightly reveal it with the brush tool.
Make sure that the ribbon is at the top left corner flipped up-side down because this is going to be a printed flip card.
After create a new layer, and using the text tool type in the words "Happy Holidays" and make the font pretty noticeable and put the color white, and also put a layer mask on it and reveal it lightly with the brush tool.
Place the "Happy Holidays" layer on top of the ribbon. (Remember it has to be upside down.)
Next get a Christmas tag for presents that says "Merry Christmas" or blank if you want to do it hand-written. Put it under the ribbon and the text "Happy Holidays", and this is not upside down.
Add a layer mask to the Christmas tag, and with the brush tool lightly reveal it. and calculate how big it has to be because you don't want it to go over the middle.
If you have a logo for yourself, make sure you put it at the right hand corner of your card, and put it upside down.
Next put a text box at the bottom right hand corner, and make it big enough to not go over the middle, but big enough to write in it.
Using the rectangular tool, make a box, and color it in white, and free transform it to adjust it to the right size you need it.
After all this, you should have your Christmas card done, and ready to give to someone on this special day.
Friday, November 6, 2009
10:24 November 6, 2009 http://www.creativepro.com/article/photoshop-how-to-quick-and-easy-collages-
In photoshop, one of the most powerful features that it has is the ability to create layers. Layers are very useful when it comes to creating collages or montages, because with the help of layers, you can place each image wherever you want and edit them in any way you want. You can also put masks or layer masks and apply effects to the image. To create this montage/collage, you have to go hunting for pictures or images. You cannot have a collage or montage with 3 pictures, you are going to need a lot more than that. Once you get all these images you have to place them all into one document. This document will allows you to choose among all of the images without having to continuously opening and closing different files. You also have got to make sure that you set the resolution and color mode to match that of your other images. Then just drag and drop each image onto the new document, and they will automatically be placed in separate layers for you in photoshop. One thing that is important, you have go to name your layers, because you don't want to be struggling to find that specific layer. After just edit and apply effects to your images, transform them in any way, and your collage/montage will be done.
In photoshop, one of the most powerful features that it has is the ability to create layers. Layers are very useful when it comes to creating collages or montages, because with the help of layers, you can place each image wherever you want and edit them in any way you want. You can also put masks or layer masks and apply effects to the image. To create this montage/collage, you have to go hunting for pictures or images. You cannot have a collage or montage with 3 pictures, you are going to need a lot more than that. Once you get all these images you have to place them all into one document. This document will allows you to choose among all of the images without having to continuously opening and closing different files. You also have got to make sure that you set the resolution and color mode to match that of your other images. Then just drag and drop each image onto the new document, and they will automatically be placed in separate layers for you in photoshop. One thing that is important, you have go to name your layers, because you don't want to be struggling to find that specific layer. After just edit and apply effects to your images, transform them in any way, and your collage/montage will be done.
Friday, October 30, 2009
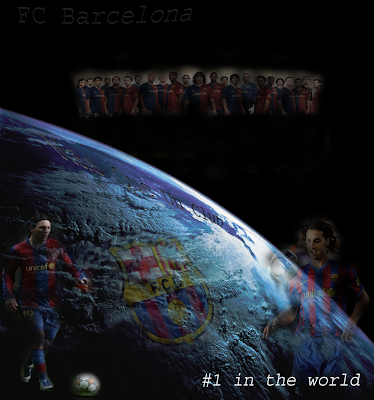 This Montage that I created of "FC Barcelona" is a message to the world that "Barcelona" is the best soccer club in the world. They won the 3 most important championships: La Liga, Champions League, and Copa del Rey. Currently, Barcelona is in 1st place in their league, and 2nd in Champions league, and one of the best in Copa del Rey. Barcelona has some of the best players in the world, and their ultimate rival is Real Madrid. Barcelona is ranked number 1 in the world, and everyone knows that they are the best and are going to continue being the best. They are playing very well this year and they are favorites to win La Liga, Champions League, and Copa del Rey.
With This montage I am making known that I am a big Barcelona fan, and that I know that they are the best in the world, and continue being the best. Barcelona contains a mixture of players, not only Spanish players but also Mexican, African, Swedish, Argentinian and other types.
Subscribe to:
Posts (Atom)